Business Email Guide For Bizsomething Server
FAQ


Technomancer offers three (3) types of Email Services with the following features:

• This guide is for customers who have availed of (1) Technomancer Domain for Emails

I. Setting up a Technomancer Business Email
II. Connecting your Technomancer Business Email to your Gmail
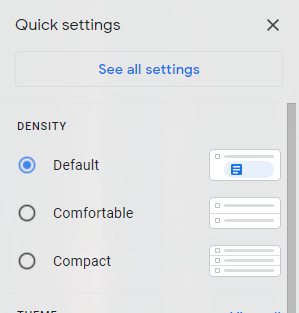
1. Click the gear icon on the top right.

2. Select "See all settings".
3. Select "Accounts and Import".

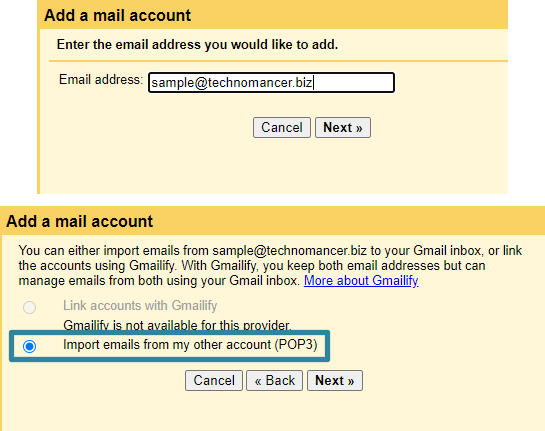
4. Look for the "Check mail from other accounts" tab and select "Add a mail account". A pop-up should appear.

5. Enter your business email account then click "Next". Choose to the "Import emails from my other account (POP)" option.
6. Enter your business email logon settings. Please note the following POP Server settings (these are the same settings noted in Section I-1);
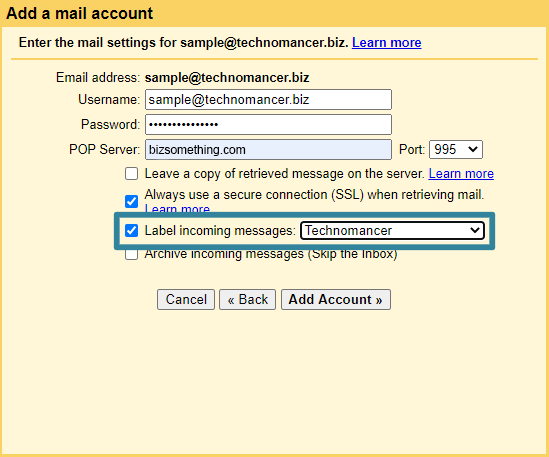
NOTE: It is not required, but we strongly recommend labelling incoming messages from your business email, so that they do not get mixed with your personal emails. You can click the "Label incoming messages" list box and select a new label as seen in the image above.
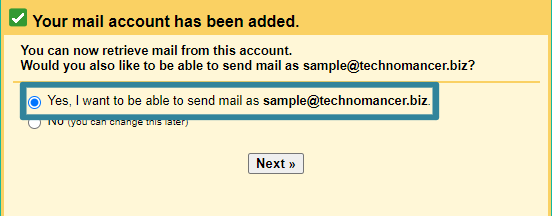
7. Make sure that you can send emails using your business account, then click "Next".
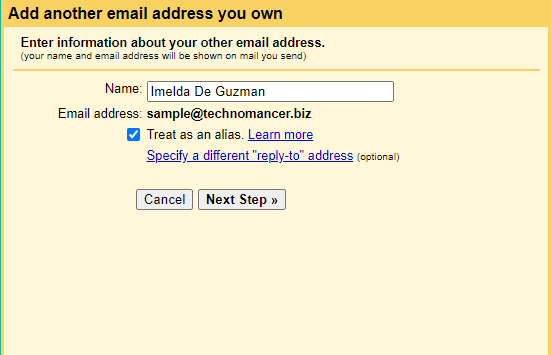
8. Give the alias you want for your business email, then click "Next Step".
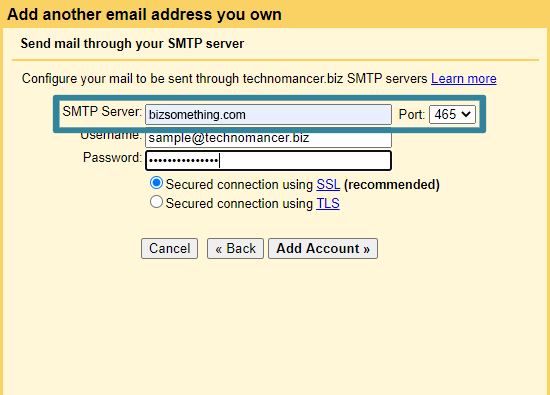
9. You'll need to enter your outgoing (SMTP) email server settings (these are the same settings noted in Section I-1):
10. Finally, you can confirm your email address by opening the confirmation link or entering the confirmation code.
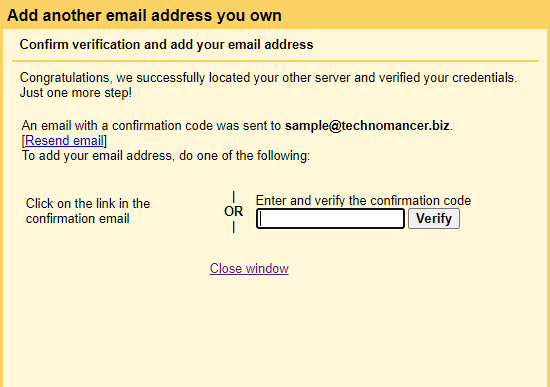
NOTE: To get the confirmation link or confirmation code, you need to check your Gmail account. Go back to Google mail and click the "Refresh" button. This will import your email immediately, instead of having to wait for the next refresh cycle (around 45 minutes). After refresh, the confirmation email should appear. You can either get the confirmation code from the email to enter in the previous window, or you can simply click the confirmation email link.
11. Congratulations! Your business email setup is now complete.
III. Additional Information
1. Congratulations! Your setup is complete. All your emails will now appear under the new folder (Technomancer in this particular case).

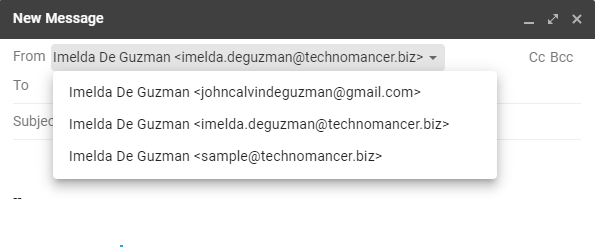
2. When sending emails, you can choose to send as your original Gmail email address, or your business email address.
NOTE: Under the "Accounts and Import" Settings, "Send mail as" tab, you can also choose to make you Business email the default email account to use.
3. We can set up email groups, such as hr@yourcompany.com. Then all emails to that would go to all members. As a matter of good practice, if someone from the hr group replies, they can CC the group email address to keep everyone in the loop.
4. We can set up one email as the catch-all. Meaning any misspellings will go to that catch-all email. For example, if someone sends an email to hrr@yourcompany.com (hrr instead of hr), that email will go to the catch-all email address, so that the proper attention can be given (such as informing the sender about the mistake).